
Optimizing your website with the right tools can help monitor its seo performance and keep it in check. Yoast SEO can be your best option to do this.
To configure the Yoast SEO plugin to Google Search Console go to your wordpress dashboard and click on ‘’SEO’’ then click on ‘’General’’.


Next, click on “features”

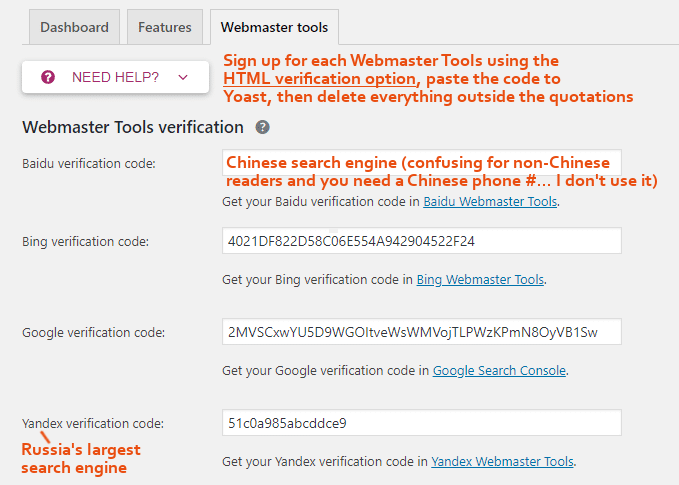
Next, click on “Webmaster Tools”

Scroll down, you will find the area where you have to input the google verification code.
Click on the link below the text box to get your google verification code.
Wait! Before you click on that link to get your google verification code.
Make sure you are logged into your gmail account. If you don’t have a gmail account, create one.
That is so easy.
After you have created it or logged in, you can now go ahead to click on the link to get your google verification code.

You will be redirected to your google search console page.
Once on that page, click on the ‘’alternative methods’’ tab.
After that select the HTML tag method.
Next, highlight and copy the code.
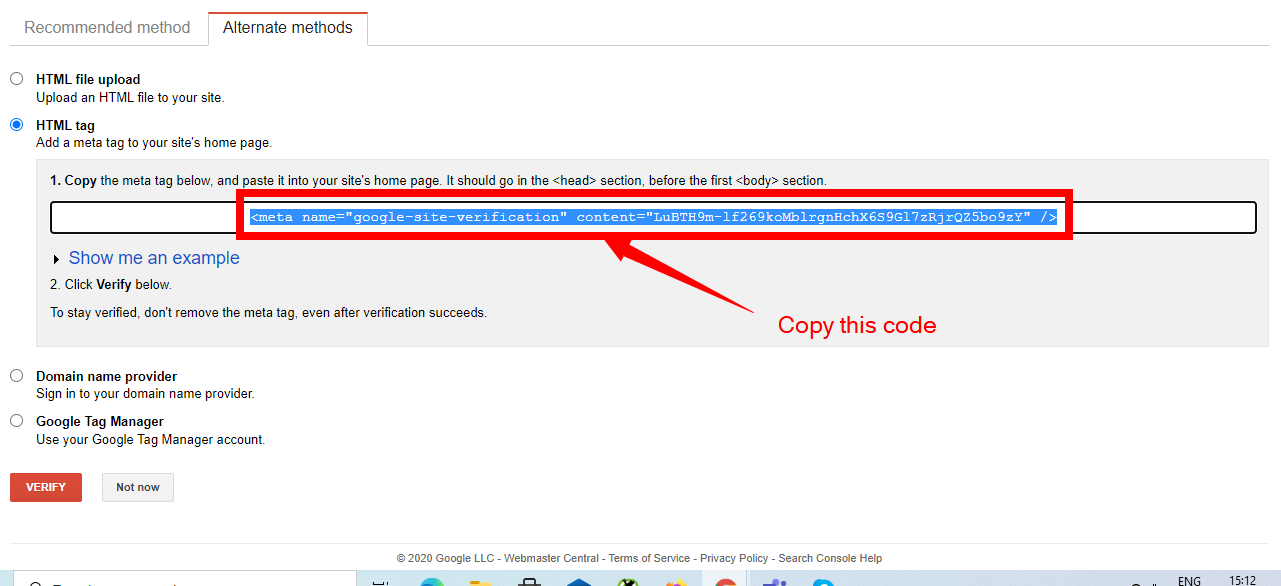
Go back to the yoast SEO dashboard, under ‘’ webmaster tools, Paste the code in the ‘’google verification code area’’ and click on ‘’save changes’’.

Go back to the console and click ‘’verify’’.

The next step is to go back and repeat the process for Bing and Yandex once the connection is verified.
There’s an image I took from Tom’s blog (onlinemediamasters.com). He did a really great Job at explaining the different search engines
You can find the link to his blog here
Next, go to your wordpress dashboard
Click on SEO
Go to search Appearance
Then ‘’General’’

Content Types


I will skip everything else, scroll down and click ‘’save changes’’
Next go to media

Next go to ‘’taxonomies


When you’re done, click on ‘’save changes’’ and move to

When you’re done, click ‘’save changes’’ and move to breadcrumbs

-------------------------------------------------------------------------------------------------------------------------
I collected the content below from this website https://onlinemediamasters.com/yoast-wordpress-seo-settings/
Tom did a great Job at explaining what breadcrumbs are
Breadcrumbs – navigation text that appears at the top of your content:

It helps users and search engines learn your content and site structure. I don’t use breadcrumbs to prevent clutter, but I recommend them if you don’t mind the extra text.

Once you’re done. Click save and move to the next step- Social to accounts

Enter all your social media links and click
‘’Save’’

Next, move to twitter

And lastly move to pinterest

That should be it for the configuration of Yoast SEO plugin.
Oh, wait! Before you go
We almost forgot a very important step.
Add your sitemap to google search console.
According to google(You can find the link to the google article here https://support.google.com/webmasters/answer/156184?hl=en )
A sitemap is a file where you provide information about the pages, videos, and other files on your site, and the relationships between them. Search engines like Google read this file to intelligently crawl your website.
Now, what you need to do is to collect your sitemap and submit it to google search console.
Go back to your wordpress dashboard
Click on yoast SEO
Go to ‘’General’’
Then click on ‘’features’’
Once there, scroll down, you will see the XML sitemap section.
Click on the question mark icon
And finally, click on the link to see your xml sitemap.


After you click on the question mark icon, you will be redirected to your site’s XML sitemap.
It looks something like this
Copy the link from your address bar

Go to google search console
On the search console dashboard you will see ‘’sitemaps’’
Click on it and add your sitemap

Connect Google Analytics
The next step is to connect google analytics to your website.
Google Analytics is a tool created by Google in November 2005. The tool helps you collect data about your customers.
That said
Go to google and type google.com/analytics and click on the first result.

You will now be redirected to the first page, please click to get started

When you click to get started, you will be redirected to a page where you will enter an account name. This is a name that would be associated with your google analytics account.

Next, select what you want to measure. It is a website or an app.
In your case it will be a website. So, please select the website option and click next

The next step would be to enter your website name, your website URL, select the category and timezone, then click ‘’create’’

Once you have created the google analytics account, it’s now time to connect google analytics and your website.
We will use a plugin called monster insights to do the connection
Go to your wordpress dashboard and click on ‘’’plugins’’
Make sure to install and activate the plugin.
If you don’t know how to install and activate a plugin, go to the blogtoolscorner.com/bonus to download a manual on how to Install and activate a plugin.

Next step, launch the setup wizard.

Once you launch the setup wizard, you will be redirected to the setup dashboard.
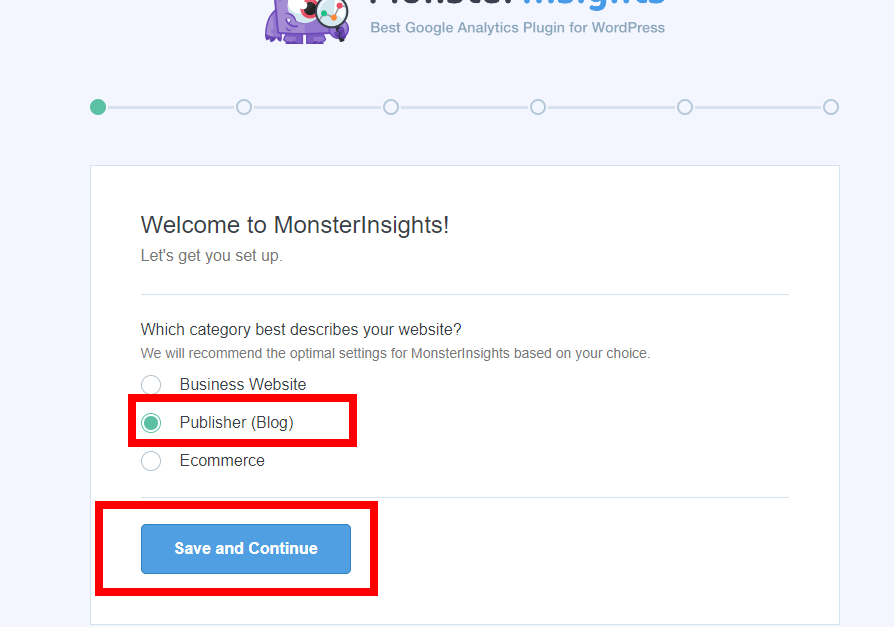
First step to configuration, choose the type of website you have. - Business , Blog or ecommerce website?
After that, make sure to save and continue.
Step 2: Connect Monster Insights to your website.

After that choose which google account is associated with your google analytics account.


And click ‘’complete connection’’

After the authentication finalizes, you will be logged out of your account.
Be sure to log back in and leave the recommended settings as is. Don’t change anything. And then click next...


Make sure to complete all the steps, then click on ‘’finish setup and exit the wizard

